 |
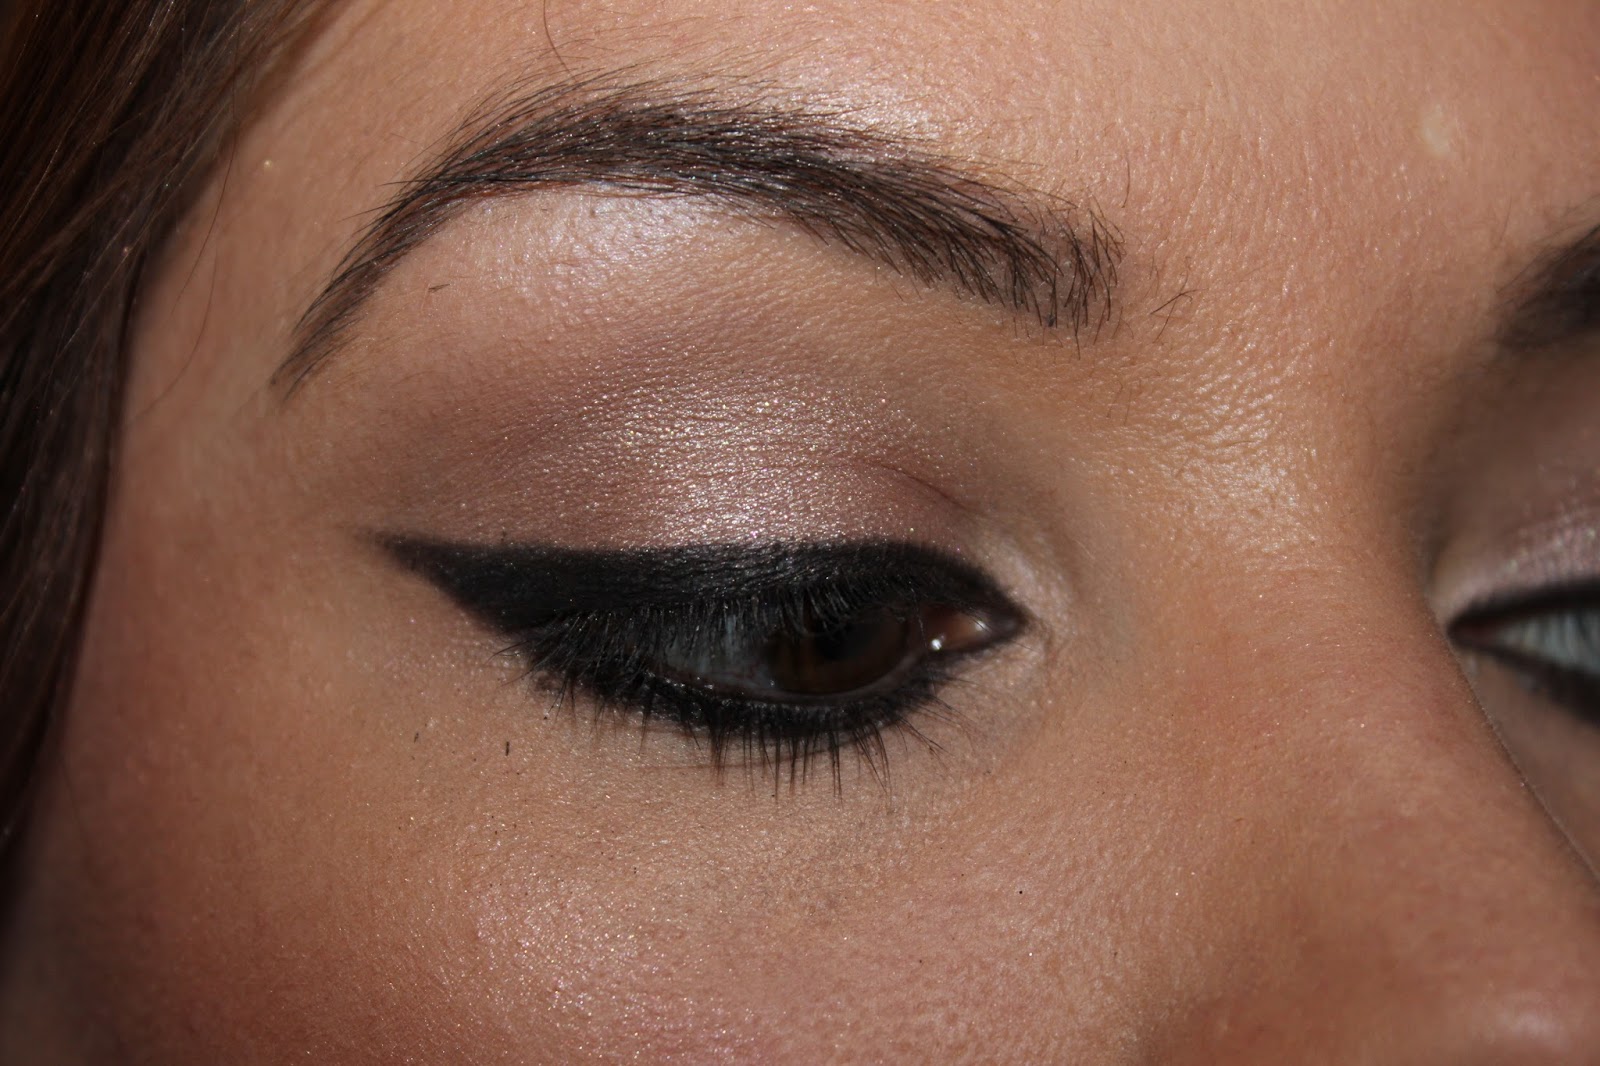
| Basic, shaped eye shadow placement. Subtle colours for liner focused look. |
Per my earlier posts on liners, this is the kick off chapter in my second eye tutorial series which is going to be about eye shadow application options (following on from my basic eyeliner tutorial on Saturday - link here, and cat eye liner on Tuesday, here). That, and a few coats of mascara should see you right with any of the eye shadow methods I outline in the coming weeks.
I'm going to go over three main ways of doing your eye shadow which are:
1 - Basic shaping / shading
2 - Taking it from desk to dance floor (smokey eye)
3 - Cut crease (more drama)
With these three techniques you can hopefully play with colour and placement in order to achieve a myriad of fun and fabulous eye looks.
So, here we go for the most basic of looks. I have used three main shades to achieve the above look - a lightish brown to shape the crease of my eye, a cream shade to act as a highlight on my brow bone and inner corner and finally the actual eyeshadow colour I'm using on the lid.
1 - Basic shaping / shading
1.1 Shaping
Using a crease brush I apply a taupe shadow (matte finish) to shape where I will place my main lid colour. This acts as a guide so I don't end up looking like an 80s hooker but also a transition colour as I'll blend my lid colour into it. I prefer a matte finish for a basic look here because it's less frosty over all.

I've used Urban Decay Naked Basics 2 (third shade), but if you're starting out grab a similar shade from Revolution Cosmetics for £1. They still blend pretty decently - and another plus is that you can use it as a contouring shade too if you want!
Depending on whether I'm going for a pin-up style look or just daytime, I may also lightly shade under my eye. Not so for pin-up as I'll concentrate on a natural look and big top liner only, for day time I'll shade underneath the eye at least half way with my contour shade.
1.2 Highlighting
I'm using a satin finish shade for this, but you can use a shimmery shade or even just some concealer for this part. Some people aren't keen on the inner eye highlight as they don't feel it's natural (or this could just be on me where I wear shimmery white) but I think it brightens my eye area and helps the overall look - just play with what you think is right for you.
You can use two different shades - e.g. a pale gold in the tear duct and a lighter shade on the brow bone, as the gold will likely blend into your lid shade more subtly.
1.3 Colouring in!
With a fluffy brush I've applied my main lid colour, which here is a just a natural shadow from Urban Decay (Sin) as I was going for a relatively understated look - some eyeliner and I'm done for an easy, natural look.

This technique can similarly be used for evening looks - e.g. the one below where I've used a red shade to shape (MAC Cranberry) and a loose, shimmery shadow on the lid (Illamasqua Fervent) on the lid. The application technique is identical to the below, but obviously the shade choice ups the drama of the look a lot.
1 - Basic shaping / shading
1.1 Shaping
Using a crease brush I apply a taupe shadow (matte finish) to shape where I will place my main lid colour. This acts as a guide so I don't end up looking like an 80s hooker but also a transition colour as I'll blend my lid colour into it. I prefer a matte finish for a basic look here because it's less frosty over all.

I've used Urban Decay Naked Basics 2 (third shade), but if you're starting out grab a similar shade from Revolution Cosmetics for £1. They still blend pretty decently - and another plus is that you can use it as a contouring shade too if you want!
Depending on whether I'm going for a pin-up style look or just daytime, I may also lightly shade under my eye. Not so for pin-up as I'll concentrate on a natural look and big top liner only, for day time I'll shade underneath the eye at least half way with my contour shade.
1.2 Highlighting
I'm using a satin finish shade for this, but you can use a shimmery shade or even just some concealer for this part. Some people aren't keen on the inner eye highlight as they don't feel it's natural (or this could just be on me where I wear shimmery white) but I think it brightens my eye area and helps the overall look - just play with what you think is right for you.
 |
| I appear to have lost my pre-lid shade photo. Apologies for that...but you get the gist. |
1.3 Colouring in!
With a fluffy brush I've applied my main lid colour, which here is a just a natural shadow from Urban Decay (Sin) as I was going for a relatively understated look - some eyeliner and I'm done for an easy, natural look.

This technique can similarly be used for evening looks - e.g. the one below where I've used a red shade to shape (MAC Cranberry) and a loose, shimmery shadow on the lid (Illamasqua Fervent) on the lid. The application technique is identical to the below, but obviously the shade choice ups the drama of the look a lot.
Hope this helps and you're able to have lots fun re-creating - do make sure to use my hashtag #josephinesparklesbeautyblog on Illamasqua and Twitter so I can see the results of all your hard work!!
Love, hugs and shimmery kisses 'til next time kitty kats
xx Josephine xx
No comments:
Post a Comment